I've noticed of late that pasta bake type recipes don't seem to call for a roux but a simple sour cream and cheese concoction.....well, I just don't know about it. Call me old fashioned I guess but I don't mind mixing a little butter and flour together, then stirring in the milk until it starts to thicken ....it's not that hard. So here is a simple pasta bake that is quick and easy to make and your kids are gonna love it!
ingredients
1/2 large or 1 whole small cauliflower, chopped into florets
1 box of Penne Regate Pasta (Barilla brand) SORRY! I had typed 375g but is actually a 500g pack!
50g butter
50g plain flour
2 cups milk (we use lite)
200 g of grated parmesan (measured into 100g lots)
2 pieces of day old bread chopped into fine bread crumbs (we use wholemeal bread)
2 tablespoons finely chopped parsley
salt and pepper
method
Place large pot of water on to boil.
Pop oven on to 190C and have large dish for pasta ready (no need to grease)
Make your bread crumbs and set aside. Place butter in a medium saucepan and place on stove (don't turn on flame just yet)
Have milk in a jug ready to pour.
Mix bread crumbs, 100g cheese and the parsley together and set aside.
When water starts boiling set timer for 11 minutes and pop pasta and cauliflower into pot. Now put the butter over a low heat. When melted take off heat and add flour until combined and smooth. Put back on heat and add milk, slowly, slowly, combining as you go at the start. Empty milk into saucepan and keep stirring. Turn up the heat a little. You don't want it to boil but if the heat is too low it will take a while for it to thicken so I usually adjust the temp as I go. It should just be ready at the 11 minute mark! When thickened turn off heat and add the other 100g of cheese plus salt and pepper. Stir to melt the cheese. Drain your pasta and cauliflower. Place them in your large dish. Pour over the cheese sauce and combine well. Sprinkle with the cheese, breadcrumb and parsley mix. Sprinkle with a little salt and pepper. Place in the oven and cook for 20 to 25 minutes until nice and browned on the top.
I actually forgot to include the parsley when I took photos for this dish - it tastes fine either way : )
Wednesday, August 14, 2013
Saturday, August 3, 2013
Broccoli Pesto with Pappadelle....A Winter Warmer for 2
I had every intention of posting this recipe last week so I would keep to my 1 recipe a month deal I had with myself but alas I have let it slide.....by only a few days : )
I came across this recipe last Summer and have since made it so many times that I now make it to exactly how we like pesto. When I say "we" I mean my husband and I. Our kids don't like this dish one bit. I thought they would love its creaminess and its cheesiness but they often took one look at the "green pasta" that was presented in front of them and ask for a ham sandwich instead. So now this has become a dish for us and the kids get fish fingers with salad. It's a win/win : )
Broccoli Pesto with Pappadelle
Ingredients:
About 300g of Pappadelle pasta (or enough for 2 people)
Extra virgin olive oil
1 head of broccoli, cut into florets
1/3 cup toasted pine nuts
1 small clove of garlic, chopped
1 cup parmesan cheese
1 tablespoon chopped oregano
1/3 cup pouring cream
salt and pepper
Place a large pot of water on to boil. If you have the room, pop another pot of water on to boil too. If not then, read on. When water is boiling, throw in broccoli florets and boil for 4 minutes then pull out using a slotted spoon and place in a bowl. Keep water boiling. Add a dash of salt and throw in the pasta. Set timer as per packet instructions. The brand I use takes 10 minutes. Once pasta is in, make your pesto with a food processor. Throw in 3 teaspoons of extra virgin olive oil; 3/4 of the broccoli; the toasted pine nuts, the garlic; 1/2 the cheese and all the oregano. Process until it looks like tapenade. This is how we like it but you can add more cheese or more oil or more garlic to suit your taste : )
When there is about 6 minutes left on the pasta timer add a good splash of extra virgin olive oil to a frying pan over very low heat and add the pesto. Keep it moving with a wooden spoon and heat through. Drain the pasta very well and add it to the pesto in the frying pan along with a dash of salt and pepper (Go lightly with the salt as it will be quite salty from the cheese) and finish with the extra broccoli pieces and the cream. Mix through well then place in 2 bowls. Top with the remaining cheese and I like to add another dash of salt and pepper......So good!
I came across this recipe last Summer and have since made it so many times that I now make it to exactly how we like pesto. When I say "we" I mean my husband and I. Our kids don't like this dish one bit. I thought they would love its creaminess and its cheesiness but they often took one look at the "green pasta" that was presented in front of them and ask for a ham sandwich instead. So now this has become a dish for us and the kids get fish fingers with salad. It's a win/win : )
Broccoli Pesto with Pappadelle
Ingredients:
About 300g of Pappadelle pasta (or enough for 2 people)
Extra virgin olive oil
1 head of broccoli, cut into florets
1/3 cup toasted pine nuts
1 small clove of garlic, chopped
1 cup parmesan cheese
1 tablespoon chopped oregano
1/3 cup pouring cream
salt and pepper
Place a large pot of water on to boil. If you have the room, pop another pot of water on to boil too. If not then, read on. When water is boiling, throw in broccoli florets and boil for 4 minutes then pull out using a slotted spoon and place in a bowl. Keep water boiling. Add a dash of salt and throw in the pasta. Set timer as per packet instructions. The brand I use takes 10 minutes. Once pasta is in, make your pesto with a food processor. Throw in 3 teaspoons of extra virgin olive oil; 3/4 of the broccoli; the toasted pine nuts, the garlic; 1/2 the cheese and all the oregano. Process until it looks like tapenade. This is how we like it but you can add more cheese or more oil or more garlic to suit your taste : )
When there is about 6 minutes left on the pasta timer add a good splash of extra virgin olive oil to a frying pan over very low heat and add the pesto. Keep it moving with a wooden spoon and heat through. Drain the pasta very well and add it to the pesto in the frying pan along with a dash of salt and pepper (Go lightly with the salt as it will be quite salty from the cheese) and finish with the extra broccoli pieces and the cream. Mix through well then place in 2 bowls. Top with the remaining cheese and I like to add another dash of salt and pepper......So good!
Thursday, June 13, 2013
chai spiced cookies
you know winter has arrived when you love having the oven on as it cooks a hearty meal slowly over many hours and dessert after dinner is not simply an iceblock to cool down but something warming too.
I always love chai tea in winter. There's something almost medicinal about brewing the spices over a pot on the stove and adding a generous amount of honey, of course.
I've been thinking about making some easy to make biscuits using chai spices for a while now and finally here is a recipe that I would be more then happy to pull out on any cold night fresh from the oven. enjoy...
Ingredients
250g Plain Flour
1/2 teaspoon bicarb soda
1/2 teaspoon ground cinnamon
1/2 teaspoon ground cardamom (plus a dash more)
1/4 teaspoon ground cloves
1/4 teaspoon ground ginger
125g unsalted butter, cold and chopped into cubes
135g brown sugar
60ml/1/4 cup boiling water
1 tablespoon honey (I used Beechworth Tasmanian Leatherwood)
Method
Pre heat oven to 180C, fan forced and line 2 baking trays with baking paper
Sift flour, bicarb soda and spices together in a large bowl.
Boil water. Measure out 1/4 cup of boiled water into a heat proof bowl and stir in honey until dissolved.
Add the butter and sugar to the flour mix and rub until the mix resembles bread crumbs.
Add the boiled water to the flour mix and stir with a flat blade knife until the mix starts to form a soft dough. Kneed lightly with your hands and then roll into small balls (approx 20g each) and place on baking tray, squashing them down slightly with your thumb. Allow room for spreading. You should get at least 36 cookies from the mix.
Bake for 15 minutes. Leave on the trays for 10 minutes before cooling completely on a rack. Store in an airtight container for up to 3 days.
enjoy with some hot and spicy chai tea!
I always love chai tea in winter. There's something almost medicinal about brewing the spices over a pot on the stove and adding a generous amount of honey, of course.
I've been thinking about making some easy to make biscuits using chai spices for a while now and finally here is a recipe that I would be more then happy to pull out on any cold night fresh from the oven. enjoy...
Ingredients
250g Plain Flour
1/2 teaspoon bicarb soda
1/2 teaspoon ground cinnamon
1/2 teaspoon ground cardamom (plus a dash more)
1/4 teaspoon ground cloves
1/4 teaspoon ground ginger
125g unsalted butter, cold and chopped into cubes
135g brown sugar
60ml/1/4 cup boiling water
1 tablespoon honey (I used Beechworth Tasmanian Leatherwood)
Method
Pre heat oven to 180C, fan forced and line 2 baking trays with baking paper
Sift flour, bicarb soda and spices together in a large bowl.
Boil water. Measure out 1/4 cup of boiled water into a heat proof bowl and stir in honey until dissolved.
Add the butter and sugar to the flour mix and rub until the mix resembles bread crumbs.
Add the boiled water to the flour mix and stir with a flat blade knife until the mix starts to form a soft dough. Kneed lightly with your hands and then roll into small balls (approx 20g each) and place on baking tray, squashing them down slightly with your thumb. Allow room for spreading. You should get at least 36 cookies from the mix.
Bake for 15 minutes. Leave on the trays for 10 minutes before cooling completely on a rack. Store in an airtight container for up to 3 days.
enjoy with some hot and spicy chai tea!
Friday, May 10, 2013
Scrummy Lemon Bake or Lemon Syrup Slice
Every now and then I take a look at the Cookbooks in our local library to see what's new and I came across one by the Australian Actress, Lisa McCune. It has the very sweet title of "Honeyjoys and Hopscotch" and I figured it would be right up my alley. There are great family recipes and theres a nice mix of lunchbox ideas, party treats and other yummy things.....well, one such yummy thing I came across was a recipe for Lemon Bake (p 214) I made it according to the original recipe and though it was delicious beyond words.....I just didn't feel comfortable with the amount of butter and sugar incorporated. So I have rejigged it......just a little itty bit.
Ingredients
150g Butter, softened
150g Caster sugar
2 eggs, at room temperature
1/2 cup greek yoghurt
1 1/2 cups self raising flour
1 teaspoon baking powder
zest of 2 lemons
juice of 2 lemons
1/4 cup granulated sugar
Method
Pre-heat oven at 170C. Line a 20 x 30 x 4cm tray with baking paper.
beat the butter and sugar on high speed until pale and fluffy. Add the eggs one at a time followed by the yoghurt, beat until creamy.
Sift in the flour and baking powder and once incorporated add the lemon zest. Transfer to the tray and bake for 30 - 35 minutes until top is golden and test the cake with a metal skewer until it comes out clean.
Remove the cake from the oven and prick with a skewer, covering it with little holes all over. Mix the juice and sugar in a cup and spoon it over the cake. Allow the cake to cool and enjoy at room temperature with a cup of tea.......heaven!!
Depending on the size of the slices you could serve up to 10 people.
Ingredients
150g Butter, softened
150g Caster sugar
2 eggs, at room temperature
1/2 cup greek yoghurt
1 1/2 cups self raising flour
1 teaspoon baking powder
zest of 2 lemons
juice of 2 lemons
1/4 cup granulated sugar
Method
Pre-heat oven at 170C. Line a 20 x 30 x 4cm tray with baking paper.
beat the butter and sugar on high speed until pale and fluffy. Add the eggs one at a time followed by the yoghurt, beat until creamy.
Sift in the flour and baking powder and once incorporated add the lemon zest. Transfer to the tray and bake for 30 - 35 minutes until top is golden and test the cake with a metal skewer until it comes out clean.
Remove the cake from the oven and prick with a skewer, covering it with little holes all over. Mix the juice and sugar in a cup and spoon it over the cake. Allow the cake to cool and enjoy at room temperature with a cup of tea.......heaven!!
Depending on the size of the slices you could serve up to 10 people.
Tuesday, April 2, 2013
Spiced Apple Crumble Cake - The Easter That Was!
Here is a recipe I am posting for my friend Caroline. I've made this cake a few times now and it's one that never disapoints.... We had inhaled most of our easter eggs by Sunday night and I thought, Thank goodness I am making this cake tomorrow to take to Carolines house!.....I was pretty sure I needed at least a 12 hour break from chocolate : )
So after a lovely relaxing long lunch we enjoyed this cake with fresh cream and icecream....you can never have enough of both!
This recipe comes from a cookbook called, Organic Cookbook (naturally good food) by Renee Elliott of Planet Organic and Eric Treuille and it has been my favourite one since I bought it over 10 years ago. It has great all round recipes, something for everyone and it even offers alternatives to most recipes.
Spiced Apple Crumble Cake
Crumble
125g plain flour
60g raw sugar
90g butter (I use unsalted)
Fruit
4 apples, sliced (thickish slices will result in slightly harder fruit while thinner slices will melt in the mouth)
1 tablespoon raw sugar
1 teaspoon ground cinnamon
Cake
175g plain flour
2 teaspoons baking powder
3 eggs
1 tablespoon milk
175g butter, softened (I ues unsalted)
175g raw sugar
Pre heat oven to 190C and line a cake tin with baking paper.
for the crumble, place the ingredients into a food processor and pulse until a coarse crumble. set aside.
for the fruit, combine apple slices and sugar and cinnamon in a bowl until evenly coated.
for tha cake. Sift flour and baking powder in a bowl and set aside. beat eggs with milk in a small bowl and set aside. In a large bowl beat the butter until light and creamy. gradually beat in the sugar a little at a time until all incorporated. Add the egg mix gradually, beating well each time. Fold in flour carefully.
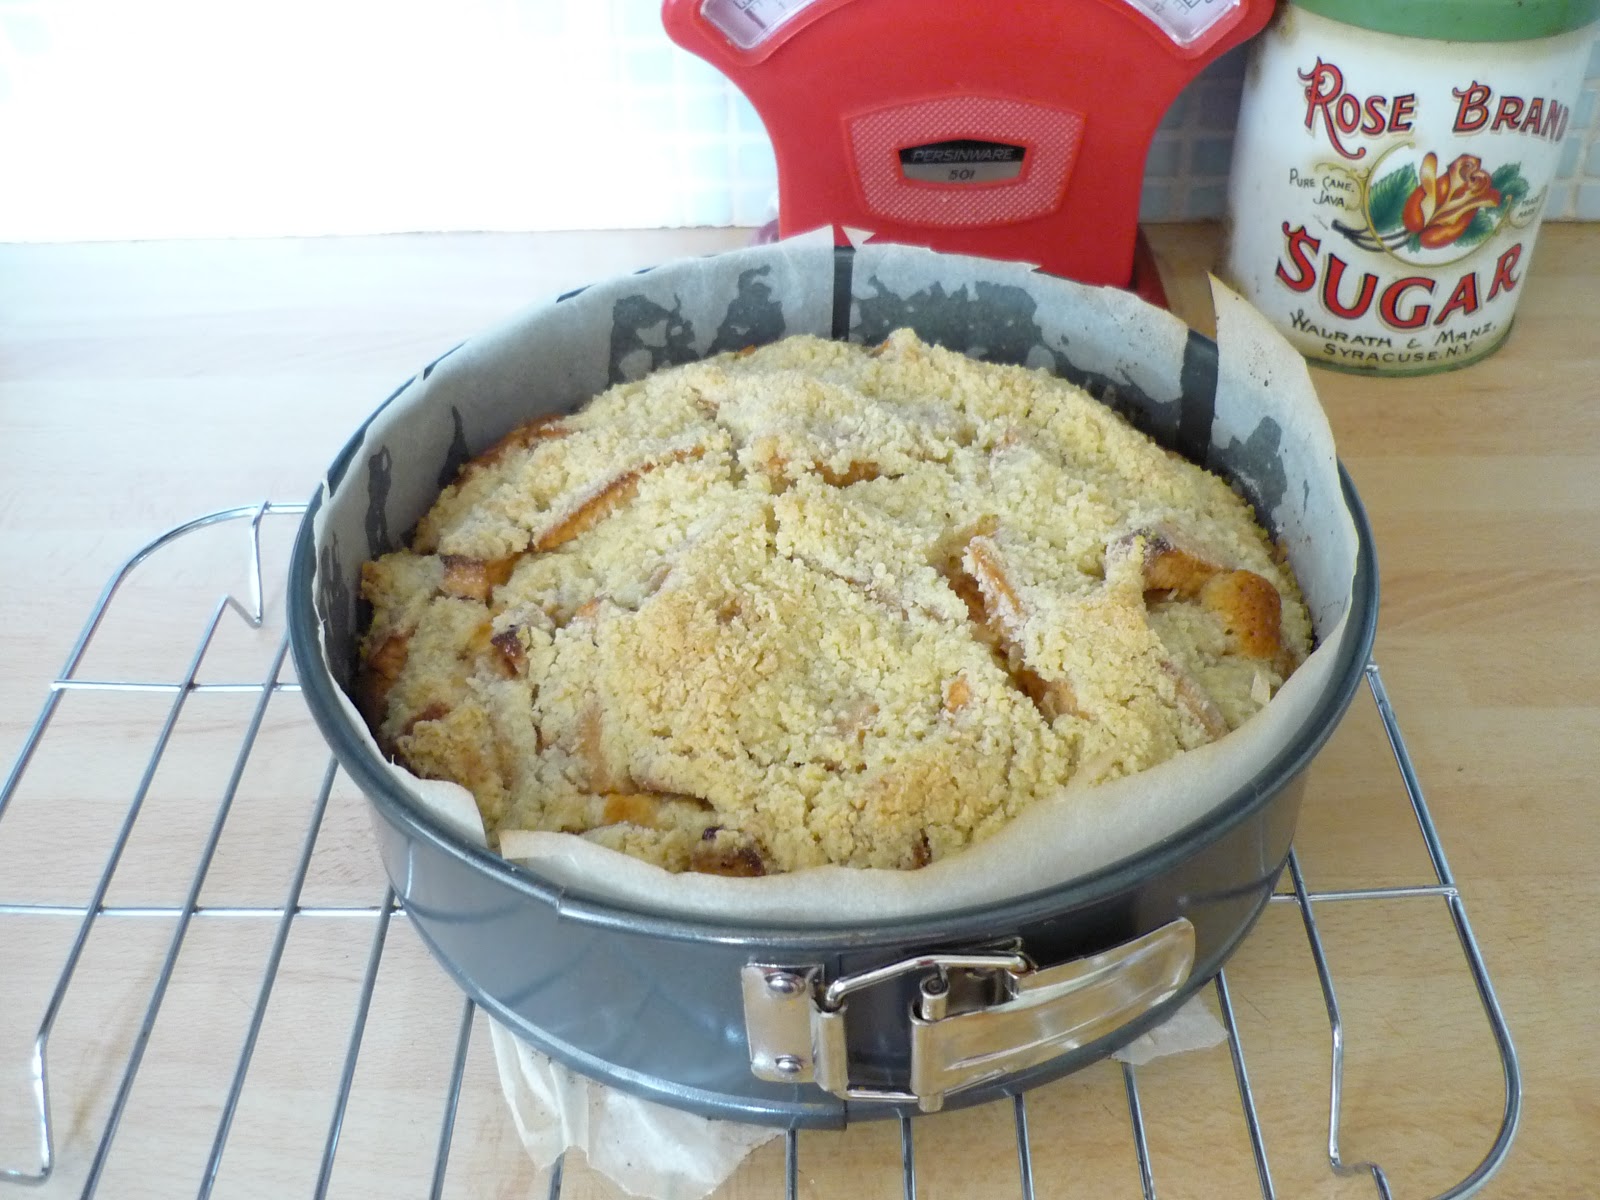
Spread the mix evenly in the cake tin. Throw over the apples and then sprinkle over the crumble. The recipe states to cook for 1 hour or until cake has pulled away from the sides and the crumble is golden brown. For me it has always been more like 1 hour and 15 mins. Leave to cool in the tin for 15 mins before attempting to pull it out and serve. Enjoy fresh from the oven with lashings of cream and icecream!
variations:
Rhubarb and ginger - replace apples with 750g rhubarb cut into 1cm pieces. replace cinnamon with ground ginger. proceed as normal.
Blackberry and apple - reduce apples to 2 and add 250g blackberries. proceed as normal.
enjoy! : )
So after a lovely relaxing long lunch we enjoyed this cake with fresh cream and icecream....you can never have enough of both!
This recipe comes from a cookbook called, Organic Cookbook (naturally good food) by Renee Elliott of Planet Organic and Eric Treuille and it has been my favourite one since I bought it over 10 years ago. It has great all round recipes, something for everyone and it even offers alternatives to most recipes.
Spiced Apple Crumble Cake
Crumble
125g plain flour
60g raw sugar
90g butter (I use unsalted)
Fruit
4 apples, sliced (thickish slices will result in slightly harder fruit while thinner slices will melt in the mouth)
1 tablespoon raw sugar
1 teaspoon ground cinnamon
Cake
175g plain flour
2 teaspoons baking powder
3 eggs
1 tablespoon milk
175g butter, softened (I ues unsalted)
175g raw sugar
Pre heat oven to 190C and line a cake tin with baking paper.
for the crumble, place the ingredients into a food processor and pulse until a coarse crumble. set aside.
for the fruit, combine apple slices and sugar and cinnamon in a bowl until evenly coated.
for tha cake. Sift flour and baking powder in a bowl and set aside. beat eggs with milk in a small bowl and set aside. In a large bowl beat the butter until light and creamy. gradually beat in the sugar a little at a time until all incorporated. Add the egg mix gradually, beating well each time. Fold in flour carefully.
Spread the mix evenly in the cake tin. Throw over the apples and then sprinkle over the crumble. The recipe states to cook for 1 hour or until cake has pulled away from the sides and the crumble is golden brown. For me it has always been more like 1 hour and 15 mins. Leave to cool in the tin for 15 mins before attempting to pull it out and serve. Enjoy fresh from the oven with lashings of cream and icecream!
variations:
Rhubarb and ginger - replace apples with 750g rhubarb cut into 1cm pieces. replace cinnamon with ground ginger. proceed as normal.
Blackberry and apple - reduce apples to 2 and add 250g blackberries. proceed as normal.
enjoy! : )
Monday, March 11, 2013
to die for chai tea and chocolate biscuits
where have i been? a few really cool things happened. I attended an Etsy Morning Tea at The Commons in Darlinghurst; my little Etsy shop was featured here and we organised a magic show for our sons birthday......a donut birthday cake was the best decision I have ever made!
A friend of mine recently posted on facebook a recipe that she had come across. Anything sweet and I've got to check it out. Well, today our little girl and I made them and I just had to share them....they are delicious! The original recipe is here and while I have kept pretty true to the original I did make a few minor changes.
- When I pre-heated the oven I put it on fan and kept the temperature at 180C.
- I pulled all my ingredients out and realised I didn't have any butter so I used margarine instead; it still worked.
- The recipe asks for alot of sugar - both caster and brown. Don't worry, just add it as they are not overly sweet at all.
- with the loose leaf tea, I used a chai mix
- I used 200g large dark chocolate buttons instead of the mix of white and milk choc.
- I used 2 large biscuit trays and used 1 heaped dessert spoon full of mix to create my biscuit leaving about a 5cm gap around each one and baking them all in 1 go for only 10minutes. When they were done I left them on the tray for 5 minutes and then cooled them completely on a cooling rack
enjoy! : )
Saturday, January 12, 2013
happy new year pancakes!
hi there! i hope you've all had some lovely down time over the holiday break. My husband goes back to work next week and it has been so heavenly having him home! When we haven't been catching up with friends we have been eating lots of delicious food, enjoying long swims in our pool and bike riding in the cooler parts of the day; did i mention pancakes for breakfast nearly every day!
I'm a bit picky when it comes to pancakes. Over the years I've tried lots and lots and lots and lots of different pancakes - I know, it's tough! but this recipe, which I have worked on perfecting over the last 10 years is based on one that I came across in Organic Cookbook By Renee Elliott. It is so incredibly easy! If you have electronic scales this recipe is a cinch - you'll have them ready before someone can scream, "where's the icecream!!!"
happy new year pancakes
ingredients
olive oil spray
300g plain flour, sifted
10g baking powder (about 1 TB)
good dash of salt
2 eggs, beaten (110g for the 2)
18g raw sugar (about 1TB - anymore then that and they will be too sickly sweet)
24g butter (2TB)
238g milk (just under a cup)
200g container of Farmer's Union Natural European Pot Set Yoghurt (if you use a different yohurt it will definitely affect the flavour. If you use a greek style yoghurt your pancakes will be much denser - I love the Farmer's union plain yoghurt as it doesn't impart a strong flavour and they are still quite light and fluffy pancakes)
maple syrup, icecream, jam, fruit for serving
method
Melt butter in microwave or on stove top and set aside for a minute.
If you have one use a non-stick frying pan otherwise, get out your large frying pan and spray with olive oil spray. I use to use olive oil and then wipe down with paper towel (as we don't have a non-stick frying pan) but the spray gives it a less fryed flavour. Spray liberally and pop over a medium heat.
In a large bowl mix the dry ingredients through liberally then throw all your other ingredients in and whisk together until smooth. When frypan is hot enough add a ladle full of pancake mix. When large bubbles appear on the surface flip over and cook the other side for a minute or too. Adjust the temperature as you go or as needed!
I usually make 2 small pancakes to start so the children can eat theirs first. Then I make ours quite large so I can usually get about 5 - 6 pancakes from this mix, depending on how big I make them!
I'm a bit picky when it comes to pancakes. Over the years I've tried lots and lots and lots and lots of different pancakes - I know, it's tough! but this recipe, which I have worked on perfecting over the last 10 years is based on one that I came across in Organic Cookbook By Renee Elliott. It is so incredibly easy! If you have electronic scales this recipe is a cinch - you'll have them ready before someone can scream, "where's the icecream!!!"
happy new year pancakes
ingredients
olive oil spray
300g plain flour, sifted
10g baking powder (about 1 TB)
good dash of salt
2 eggs, beaten (110g for the 2)
18g raw sugar (about 1TB - anymore then that and they will be too sickly sweet)
24g butter (2TB)
238g milk (just under a cup)
200g container of Farmer's Union Natural European Pot Set Yoghurt (if you use a different yohurt it will definitely affect the flavour. If you use a greek style yoghurt your pancakes will be much denser - I love the Farmer's union plain yoghurt as it doesn't impart a strong flavour and they are still quite light and fluffy pancakes)
maple syrup, icecream, jam, fruit for serving
method
Melt butter in microwave or on stove top and set aside for a minute.
If you have one use a non-stick frying pan otherwise, get out your large frying pan and spray with olive oil spray. I use to use olive oil and then wipe down with paper towel (as we don't have a non-stick frying pan) but the spray gives it a less fryed flavour. Spray liberally and pop over a medium heat.
In a large bowl mix the dry ingredients through liberally then throw all your other ingredients in and whisk together until smooth. When frypan is hot enough add a ladle full of pancake mix. When large bubbles appear on the surface flip over and cook the other side for a minute or too. Adjust the temperature as you go or as needed!
I usually make 2 small pancakes to start so the children can eat theirs first. Then I make ours quite large so I can usually get about 5 - 6 pancakes from this mix, depending on how big I make them!
Tuesday, December 18, 2012
our family christmas
We had my husbands family over on the weekend for our family christmas and yes it was on that particularly scorching hot day! I had to re-think my menu a little bit so I was spending as little time in the kitchen as possible and I was using the stove as quickly as possible. I know I said I was going to do a chicken ceasar salad but I just couldn't face bacon and eggs AND schnitzel in that heat. I'd found a recipe in the Christmas edition of the free Coles magazine (hey, you never know where you'll come across a decent recipe!) so after a few adjustments, things cooked and kept in the fridge and a quick pan fry later - it was done! And it was delicious, of course teamed with a few other things on the table. : )
chicken, haloumi and cherry salad
ingredients
4 chicken schnitzels (either crumb your own chicken breasts or buy them crumbed)
1 bunch of aspargus
50g peppery baby rocket leaves
1 cup cherries
1 pack of haloumi
dressing
2 TBS extra virgin olive oil
1 TBS lemon juice
1 small garlic clove, peeled and chopped in half
1 tsp dijon mustard
a pinch of caster sugar
method
This salad is lovely cold and the components of it can be made ahead of time and thrown together at the end!
About 4 hours before eating - place olive oil in a large frying pan over medium high heat and cook schnitzels together until cooked. When you take them out of the pan, drain them on paper towel and leave to cool for about 30 to 45minutes and then cover with foil and keep in the fridge.
About 2 hours before eating - Fill kettle and put on to boil. Trim ends of asparagus and give them a wash. Place them in a large bowl and cover with boiling water. set aside for 1 minute. Drain and place in a bowl of cold tap water for 2 minutes. Drain, pat dry with paper paper towel then wrap and place in the fridge. Chop cherries in half and take out the pits, discard the stalks. Keep them in a zip lock bag in the fridge.
About 30 minutes before eating - Put dressing ingredients in a glass jar with a lid. Shake and set aside. Doesn't need to go in the fridge.
Just before eating - Get your platter ready. Wash rocket leaves and scatter over the platter. Place some olive oil in a frying pan and place over a medium high heat. Take out the asparagus and scatter over the platter. Slice the haloumi however you like and fry each side for 1 minute or until lightly browned. Take out your schnitzels and slice into strips. Scatter chicken, haloumi and cherries over your platter. Discard garlic and drizzle over dressing. Serves 6 -8 as a side.
The remainder of my menu included a mix of bread rolls served with organic butter; a seafood platter of oysters, a balmain bug and fresh prawns served with tartare sauce, seafood sauce and a gorgeous garlicky aoli. I also put together a small platter of smoked salmon with crostinis, baby capers and some dill. For dessert we had mini magnums plus! my Christmas sundae and let me tell you, it all went down an absolute treat! As you can see I got the kids to paint "Christmassy things" on the paper table runner and to save myself even more time we used paper plates for eating and paper bowls for prawn shells and I had arcopal bowls with lemon and water for finger bowls and apparently salt on ice makes it melt slower! : )
chicken, haloumi and cherry salad
ingredients
4 chicken schnitzels (either crumb your own chicken breasts or buy them crumbed)
1 bunch of aspargus
50g peppery baby rocket leaves
1 cup cherries
1 pack of haloumi
dressing
2 TBS extra virgin olive oil
1 TBS lemon juice
1 small garlic clove, peeled and chopped in half
1 tsp dijon mustard
a pinch of caster sugar
method
This salad is lovely cold and the components of it can be made ahead of time and thrown together at the end!
About 4 hours before eating - place olive oil in a large frying pan over medium high heat and cook schnitzels together until cooked. When you take them out of the pan, drain them on paper towel and leave to cool for about 30 to 45minutes and then cover with foil and keep in the fridge.
About 2 hours before eating - Fill kettle and put on to boil. Trim ends of asparagus and give them a wash. Place them in a large bowl and cover with boiling water. set aside for 1 minute. Drain and place in a bowl of cold tap water for 2 minutes. Drain, pat dry with paper paper towel then wrap and place in the fridge. Chop cherries in half and take out the pits, discard the stalks. Keep them in a zip lock bag in the fridge.
About 30 minutes before eating - Put dressing ingredients in a glass jar with a lid. Shake and set aside. Doesn't need to go in the fridge.
Just before eating - Get your platter ready. Wash rocket leaves and scatter over the platter. Place some olive oil in a frying pan and place over a medium high heat. Take out the asparagus and scatter over the platter. Slice the haloumi however you like and fry each side for 1 minute or until lightly browned. Take out your schnitzels and slice into strips. Scatter chicken, haloumi and cherries over your platter. Discard garlic and drizzle over dressing. Serves 6 -8 as a side.
The remainder of my menu included a mix of bread rolls served with organic butter; a seafood platter of oysters, a balmain bug and fresh prawns served with tartare sauce, seafood sauce and a gorgeous garlicky aoli. I also put together a small platter of smoked salmon with crostinis, baby capers and some dill. For dessert we had mini magnums plus! my Christmas sundae and let me tell you, it all went down an absolute treat! As you can see I got the kids to paint "Christmassy things" on the paper table runner and to save myself even more time we used paper plates for eating and paper bowls for prawn shells and I had arcopal bowls with lemon and water for finger bowls and apparently salt on ice makes it melt slower! : )
I hope you all have a wonderful Christmas with family and friends!
Eat, Drink, Be Merry!
xxm
Thursday, November 15, 2012
simple christmas dessert or christmas sundae
Sorry it's been a while. We are all so busy, I know! Life has been turned up to 11 for the last few weeks around here.....the end though is in sight! Christmas day is only 40 days away!! I can't wait until I sit down with my family, tear open a few presents, listen to some bad jokes and eat way too much good food. Yay!
I came across Sara Lee Fruit Inspired Mixed Berry Icecream a few weeks back and I was immediately transported to Christmas. It has that lovely creamy/fruity/slightly spicy flavour of pudding icecream. Seriously! So I thought I would layer it with a few other Christmassy things to create a simple christmas dessert that anyone would love.......unless of course you're a vampire.
simple christmas dessert or christmas sundae
Ingredients
>1 litre Sara-lee Fruit Inspired Mixed Berry Icecream
>Christmas Cake (I used Big Sister Premium Rich Mini Christmas cakes 80g each) One cake did 2 desserts.
>1 punnet of fresh blueberries, washed and dryed with kitchen paper
>Ground cinnamon for sprinkling
Method
select your serving bowls/glasses and layer the ingredients however you like. Top with blueberries and sprinkle with ground cinnamon. Just make sure you get the icecream to cake ratio just perfect!
I came across Sara Lee Fruit Inspired Mixed Berry Icecream a few weeks back and I was immediately transported to Christmas. It has that lovely creamy/fruity/slightly spicy flavour of pudding icecream. Seriously! So I thought I would layer it with a few other Christmassy things to create a simple christmas dessert that anyone would love.......unless of course you're a vampire.
simple christmas dessert or christmas sundae
Ingredients
>1 litre Sara-lee Fruit Inspired Mixed Berry Icecream
>Christmas Cake (I used Big Sister Premium Rich Mini Christmas cakes 80g each) One cake did 2 desserts.
>1 punnet of fresh blueberries, washed and dryed with kitchen paper
>Ground cinnamon for sprinkling
Method
select your serving bowls/glasses and layer the ingredients however you like. Top with blueberries and sprinkle with ground cinnamon. Just make sure you get the icecream to cake ratio just perfect!
Wednesday, October 31, 2012
anzac biscuits and old cookbooks
I've tried many recipes when it comes to Anzac biscuits and this recipe is a blend of all of them. It's not a tricky recipe by any stretch of the imagination but it's the little things. Salted butter is a must! Stirring the dry ingredients really well to distribute everything evenly is crucial and baking for exactly 12 minutes will give you approx 15 small pieces of heaven!
I love coming across old cookbooks on my travels as more often then not there are little snippets of recipes scrawled down on a torn piece of paper, cut out from an old newspaper or handwritten or even typed in a letter. I recently came across The Radiation Cookery Book from the 30s with such treasures hidden inside. I was going to pop this gorgeous old book in my shop but I just couldn't bring myself to do it. I'm funny like that with cookbooks though; they mean more to me than money.
Within this little book was a typed letter. It's not dated unfortunately but it looks to be from the 50s or so. I love it! At the top is a recipe for garlic steak. Under this is a letter from Babs to Aunty Viv,
"I was speaking to Win last night and she said that you asked for the recipe (though recipe was typed as receipt!) Here it is Auntie, hope you like it as much as we do. You see I must show of to some one that I can Type, and as I'm in the typing mood to night, you will have to suffer the impersonal touch of the typewriter, sorry dear.
How are you anyway? I suppose like the rest of us, rather busy preparing for Christmas, oh, by the way June Tipper and Jimmy Vile have announced their engagement, I only hope that June Proves worthy of Jim, and I guess we will have to try and like her a little better. the ring is beautiful, I'm green with envy.
We are still struggling with our Flat trying to make it look like home, but I hope by Christmas it will be nice. I ran of the rails there, didn't I?.
Well my dear I will leave you now, hope you find the steak good.
With love from both of us",
Babs.
priceless : )
anzac biscuits
ingredients
62g Western Star original butter
30g (1 tablespoon) golden syrup (I use the CSR 500g squeeze bottle for convenience)
2 teaspoons cool tap water
1/2 teaspoon of bi-carb soda
1/2 cup oats ( I use Quaker Oats original pack)
1/2 cup shredded coconut
1/2 cup plain flour
1/2 cup brown sugar, firmly packed
method
Pop your oven on to 160C. Lay some baking paper on a large biscuit tray.
Melt the butter and golden syrup in a small saucepan over low heat until all the butter is melted. Add the water, combine and set aside.
In a large bowl add the remaining ingredients and mix really well. The brown sugar can create small lumps and you don't want to bite into a small chunk of bi carb! Add the melted mix to the dry mix and combine really well. I usually make each biscuit around 22g or so which should give you between 15 and 16 biscuits. Spread them out as they will flatten while cooking. Bake for 12 minutes.
Take out of the oven and leave to cool on the tray for 5 minutes. Remove from the tray and lay on a cooling rack until completely cool. Keep in an airtight container in a cool spot or in the fridge for a couple of days.
enjoy!
I love coming across old cookbooks on my travels as more often then not there are little snippets of recipes scrawled down on a torn piece of paper, cut out from an old newspaper or handwritten or even typed in a letter. I recently came across The Radiation Cookery Book from the 30s with such treasures hidden inside. I was going to pop this gorgeous old book in my shop but I just couldn't bring myself to do it. I'm funny like that with cookbooks though; they mean more to me than money.
Within this little book was a typed letter. It's not dated unfortunately but it looks to be from the 50s or so. I love it! At the top is a recipe for garlic steak. Under this is a letter from Babs to Aunty Viv,
"I was speaking to Win last night and she said that you asked for the recipe (though recipe was typed as receipt!) Here it is Auntie, hope you like it as much as we do. You see I must show of to some one that I can Type, and as I'm in the typing mood to night, you will have to suffer the impersonal touch of the typewriter, sorry dear.
How are you anyway? I suppose like the rest of us, rather busy preparing for Christmas, oh, by the way June Tipper and Jimmy Vile have announced their engagement, I only hope that June Proves worthy of Jim, and I guess we will have to try and like her a little better. the ring is beautiful, I'm green with envy.
We are still struggling with our Flat trying to make it look like home, but I hope by Christmas it will be nice. I ran of the rails there, didn't I?.
Well my dear I will leave you now, hope you find the steak good.
With love from both of us",
Babs.
priceless : )
anzac biscuits
ingredients
62g Western Star original butter
30g (1 tablespoon) golden syrup (I use the CSR 500g squeeze bottle for convenience)
2 teaspoons cool tap water
1/2 teaspoon of bi-carb soda
1/2 cup oats ( I use Quaker Oats original pack)
1/2 cup shredded coconut
1/2 cup plain flour
1/2 cup brown sugar, firmly packed
method
Pop your oven on to 160C. Lay some baking paper on a large biscuit tray.
Melt the butter and golden syrup in a small saucepan over low heat until all the butter is melted. Add the water, combine and set aside.
In a large bowl add the remaining ingredients and mix really well. The brown sugar can create small lumps and you don't want to bite into a small chunk of bi carb! Add the melted mix to the dry mix and combine really well. I usually make each biscuit around 22g or so which should give you between 15 and 16 biscuits. Spread them out as they will flatten while cooking. Bake for 12 minutes.
Take out of the oven and leave to cool on the tray for 5 minutes. Remove from the tray and lay on a cooling rack until completely cool. Keep in an airtight container in a cool spot or in the fridge for a couple of days.
enjoy!
Wednesday, October 17, 2012
sunny spot
Our friends over at fox drink water let us borrow their gorgeous old day bed when they moved house a while ago. It has had a beautiful old curtain panel draped over it for nearly 2 years now, well until I washed it and it decided to fall apart....literally, in my hands! So I had a look in our cupboards to see what I could use to pretty up the space again. I'd forgotton about this old single sheet that was originally mine from when I was a little one. I held onto it all these years thinking I would make some pillow cases from it one day! So I wrapped it around the mattress. Then I found the gorgeous old throw that I'd bought a few years ago at an Op shop. I know Winter is well and truly gone but I just love it. It's not perfect, it's a little rough around the edges but it's hand made and the colours go with anything. The pillow is also hand made. I bought it at Marrickville Markets about 5 years ago. I wish now that I had bought more! A lady had made all these gorgeous pillow cases from vintage fabrics and was selling them for $6 to $8 each! I fell in love with the turquoise vase and just had to have it.
After I tucked the sheet in and draped the crochet throw over the day bed and popped the pillow in its spot my son walked over and said, "That's pretty Mum. You should put it on your blog". {melt} so here it is : )
Tuesday, October 9, 2012
My SOS Salad
You know what it's like when you're travelling; especially with kids. It always takes longer then you expect to get to your destination. You never pack enough snacks for the trip. They scream every time you pass a McDonalds and everyone has to have their own individual toilet stop!
When you finally get home and you've thrown the bags into a pile on the loungeroom floor and the kids are still complaining that they want McDonalds and you look like you've been awake for 3 days, you go to the fridge, collect these ingredients and throw them together........just make sure you ask some nice person to put them there, preferably that morning! : )
My SOS Salad
Ingredients
1/2 cup cous cous
1 tablespooon butter
1/2 cup each of parsley and coriander, washed and chopped
6 to 10 mint leaves, washed and chopped
1 400g tin chick peas, drained and rinsed
1/2 red capsicum, diced
Salt, pepper, extra virgin olive oil and lemon juice
1 packet of haloumi
Method
Pop your kettle on. When it boils add 1/2 cup boiling water to the cous cous, cover and set aside for 5 minutes.
Throw herbs, chick peas and capsicum into a serving bowl.
Slice haloumi into slices and add to a heated frypan that has had some oil added to it. Fry until lightly coloured on each side. (Be careful - 9 times out of 10 I manage to overcook the heck out of haloumi!) Set aside.
Take the lid off the cous cous, put over a low heat and add 1 tablespoon of butter. Stir through until melted.
Add cous cous to the salad and season well with salt, pepper and adding the extra virgin olive oil to give it some moisture.
Serve with the haloumi on the side and some lamb chops if you like and dress it with the lemon juice at the table. This salad is also nice on its own without the haloumi too but who doesn't love haloumi!
serves 4 as a side
When you finally get home and you've thrown the bags into a pile on the loungeroom floor and the kids are still complaining that they want McDonalds and you look like you've been awake for 3 days, you go to the fridge, collect these ingredients and throw them together........just make sure you ask some nice person to put them there, preferably that morning! : )
My SOS Salad
Ingredients
1/2 cup cous cous
1 tablespooon butter
1/2 cup each of parsley and coriander, washed and chopped
6 to 10 mint leaves, washed and chopped
1 400g tin chick peas, drained and rinsed
1/2 red capsicum, diced
Salt, pepper, extra virgin olive oil and lemon juice
1 packet of haloumi
Method
Pop your kettle on. When it boils add 1/2 cup boiling water to the cous cous, cover and set aside for 5 minutes.
Throw herbs, chick peas and capsicum into a serving bowl.
Slice haloumi into slices and add to a heated frypan that has had some oil added to it. Fry until lightly coloured on each side. (Be careful - 9 times out of 10 I manage to overcook the heck out of haloumi!) Set aside.
Take the lid off the cous cous, put over a low heat and add 1 tablespoon of butter. Stir through until melted.
Add cous cous to the salad and season well with salt, pepper and adding the extra virgin olive oil to give it some moisture.
Serve with the haloumi on the side and some lamb chops if you like and dress it with the lemon juice at the table. This salad is also nice on its own without the haloumi too but who doesn't love haloumi!
serves 4 as a side
Friday, September 28, 2012
diy gelato and hello xmas menu!
Whenever we get away for a break we don't always have internet access or even a t.v. It's kinda weird not knowing what's happening in this crazy world of ours; if only for a few days!
One of the first things I do on Holidays, after I have re-aquainted myself with my husband and let said husband know that if he doesn't spend some quality time with our children the holiday is over! I head to the nearest Vinnies in search of old foodie magazines. I've collected a few over the years. My favourite, Gourmet Traveller. I just love them! They always inspire me; sometimes leading me to other ideas or cuisines. By the time we get to take a holiday both my husband and I are usually exhausted and I've almost always lost my enthusiasm for cooking - especially those last few days when I was making 3 different dinners in one night!...it's a long story.
Holidays are my time to find a comfy spot under a tree, a sunny day and a few magazines to re-ignite me! One of the 3 issues I picked up during the break was the 2005 Christmas issue and you wouldn't believe it except that I am telling you right now - I have worked out the menu forthis years Christmas Lunch!! Yay!
So, this Christmas I am using KISS as my theme - Keep it simple stupid! For starters I am going to serve King Prawns with a fresh lemon pesto - easy; for main I am going to serve chicken. My brother in law doesn't eat red meat and he's not a huge fan of seafood which leaves me with pork or chicken. So then I had an idea! Usually I'm slaving away in a hot kitchen creating a Roast with all the trimmings in 40C heat. Not this year people. This Christmas I've decided on Schnitzel. Now, just hear me out first before you start thinking it's going to be like the dodgy deep fried you may find at a leagues club. I'm thinking a parmesan crusted schnitzel each piece about the size of your palm, crumbed the night before, quickly pan fried and set aside as I'm getting the entree together. Then placed over a simple Ceasar Salad with some crusty garlic toasted bread. See, Simple : 0
Ok, so Dessert is the big finale! The thing we all hang around for at the end. Usually, at our place, it's a sad fruit platter that one family member (who shall remain nameless) has pre-cut that morning and then driven over an hour with fruit platter flying around the back seat to our house. Then we try for a while to fit the fruit platter in our tiny fridge but there's allready enough food in there to feed the whole extended family and anyone who happens to walk past our house......for the next year; so then it just stays out on the kitchen bench which is slightly hotter then the sun until the end of the day when we finally eat what the ants have left us.
Back to the Dessert! Did you catch "The Living Room" on t.v the other week? We just happen to flick the channel when Miguel was blitzing some frozen strawberries, strawberry jam, a fully scraped vanilla bean and some cream - Wa-La.....Instant Gelato! This totally blew my mind!! Can you believe it? No stirring over a hot stove until the sugar melts; no need for an expensive icecream maker and there wasn't a sugar thermometer in sight! I knew I had to try this. Back to our holiday, a few pages later I had 2 ideas that I really wanted to try (2 ideas that will become the dessert component of my xmas menu) - Watermelon and Rosewater Gelato and Pineapple and Passionfruit Gelato - here's the recipe for the latter.......it doesn't get easier then this!
Pineapple and Passionfruit Gelato
Ingredients
1 ripe pineapple
1 small tin of passionfruit or at least 5 - 10 fresh passionfruit, depending on their juice content
1 tin of light or full fat organic coconut cream (you will only need 3 heaped teaspoon fulls)
Method
Chop ripe pineapple into small pieces (as you want them to blitz easily in your machine) the night before and place in a zip lock bag in the freeezer - you should have about 500g. Separate seeds from passionfruit pulp. Keep seeds in a zip lock bag in the fridge (you can use them as garnish if you like) You should have at least 1/2 cup of pulp. Pop this is a zip lock bag in the freezer. Keep the tin of coconut cream in the fridge. When you are ready to serve, blitz everything together and dollop into your gelato cup of choice. Serve! Decorate with the passionfruit seeds or without or even add a few pieces of some reserved frozen or room temperature pineapple to garnish. The possibilities are really endless!
I'm ready Christmas!.....Bring it.
One of the first things I do on Holidays, after I have re-aquainted myself with my husband and let said husband know that if he doesn't spend some quality time with our children the holiday is over! I head to the nearest Vinnies in search of old foodie magazines. I've collected a few over the years. My favourite, Gourmet Traveller. I just love them! They always inspire me; sometimes leading me to other ideas or cuisines. By the time we get to take a holiday both my husband and I are usually exhausted and I've almost always lost my enthusiasm for cooking - especially those last few days when I was making 3 different dinners in one night!...it's a long story.
Holidays are my time to find a comfy spot under a tree, a sunny day and a few magazines to re-ignite me! One of the 3 issues I picked up during the break was the 2005 Christmas issue and you wouldn't believe it except that I am telling you right now - I have worked out the menu forthis years Christmas Lunch!! Yay!
So, this Christmas I am using KISS as my theme - Keep it simple stupid! For starters I am going to serve King Prawns with a fresh lemon pesto - easy; for main I am going to serve chicken. My brother in law doesn't eat red meat and he's not a huge fan of seafood which leaves me with pork or chicken. So then I had an idea! Usually I'm slaving away in a hot kitchen creating a Roast with all the trimmings in 40C heat. Not this year people. This Christmas I've decided on Schnitzel. Now, just hear me out first before you start thinking it's going to be like the dodgy deep fried you may find at a leagues club. I'm thinking a parmesan crusted schnitzel each piece about the size of your palm, crumbed the night before, quickly pan fried and set aside as I'm getting the entree together. Then placed over a simple Ceasar Salad with some crusty garlic toasted bread. See, Simple : 0
Ok, so Dessert is the big finale! The thing we all hang around for at the end. Usually, at our place, it's a sad fruit platter that one family member (who shall remain nameless) has pre-cut that morning and then driven over an hour with fruit platter flying around the back seat to our house. Then we try for a while to fit the fruit platter in our tiny fridge but there's allready enough food in there to feed the whole extended family and anyone who happens to walk past our house......for the next year; so then it just stays out on the kitchen bench which is slightly hotter then the sun until the end of the day when we finally eat what the ants have left us.
Back to the Dessert! Did you catch "The Living Room" on t.v the other week? We just happen to flick the channel when Miguel was blitzing some frozen strawberries, strawberry jam, a fully scraped vanilla bean and some cream - Wa-La.....Instant Gelato! This totally blew my mind!! Can you believe it? No stirring over a hot stove until the sugar melts; no need for an expensive icecream maker and there wasn't a sugar thermometer in sight! I knew I had to try this. Back to our holiday, a few pages later I had 2 ideas that I really wanted to try (2 ideas that will become the dessert component of my xmas menu) - Watermelon and Rosewater Gelato and Pineapple and Passionfruit Gelato - here's the recipe for the latter.......it doesn't get easier then this!
Pineapple and Passionfruit Gelato
Ingredients
1 ripe pineapple
1 small tin of passionfruit or at least 5 - 10 fresh passionfruit, depending on their juice content
1 tin of light or full fat organic coconut cream (you will only need 3 heaped teaspoon fulls)
Method
Chop ripe pineapple into small pieces (as you want them to blitz easily in your machine) the night before and place in a zip lock bag in the freeezer - you should have about 500g. Separate seeds from passionfruit pulp. Keep seeds in a zip lock bag in the fridge (you can use them as garnish if you like) You should have at least 1/2 cup of pulp. Pop this is a zip lock bag in the freezer. Keep the tin of coconut cream in the fridge. When you are ready to serve, blitz everything together and dollop into your gelato cup of choice. Serve! Decorate with the passionfruit seeds or without or even add a few pieces of some reserved frozen or room temperature pineapple to garnish. The possibilities are really endless!
I'm ready Christmas!.....Bring it.
Sunday, September 23, 2012
dreaming of paris
I can't quite remember where my desire to go to France came from. Whether it was my love of Art or pain au chocolat's! When I think about it I really can't recall where the idea started and why. The interior of my home is not overly french and I don't really eat french food; I think the most french thing I've eaten in a while is a croissant! I've travelled a little but I've not been to France as yet......but I dream of flying into Paris and going straight to a boulangerie and downing a croque monsieur!
Many years ago, before I met my husband, an ex-boyfriend of mine was going to France with his brother and his brother's new wife. I asked him if he could buy me something from France. I remember at the time I had no idea what to ask for so I just said, " Anything French". He brought me back the Picasso mug you can see in the 3rd pic. I fell in love with it. I was so proud of this gorgeous mug.... It was my small piece of Paris! and I have had it on show in every place that I have lived.
A few months back my Mother-in-law announced she was taking a trip to France. (It was to be just before the Tour de France, which was a double whammy for us as my husband is a bike guy!) I said the same thing to her as I'd said to my ex-boyfriend, "Bring me back anything French" and she did! She bought this beautifully simple silver bangle and had my name engraved on it and she found herself in an old antique place she saw the old soup ladel in the 2nd pic and thought of me! Gotta love French enamel!!
I also love looking through French stores on Etsy....places like French Find and Magalerie are always filled with beautiful, beautiful things!
![]() |
| Vintage photos Bordeaux, A booklet with small photos from Bordeaux, France by French Find |
![]() |
| Titled: Eiffel Tower Paris by Magalerie
a girl can dream...............but if anyone has a spare ticket.....I'm there!
: )
|
Wednesday, September 12, 2012
Spring Boats
It's here! It's here! Spring! hooray for everybody! We've been out in the garden pulling out the weeds, mulching everything within an inch of it's life and finally bringing the pool back to life; pumping it with 1000ml of algae killer - CLEAR!. The place is finally starting to sparkle again after a very long and very dull Winter. I love this time of year. Sure, the magpies manage to swoop only me in a crowd of people and the August winds love to blow every little bit of debri from the air into our pool, including a lonely sock ( if you're missing one, we've got it!) otherwise, Spring is all good!
Spring Boats - serves 4 as a snack or serve as nibbles - makes 12
Ingredients
12 chat potatoes (try and buy thin longish ones)
extra virgin olive oil
salt and pepper
1 x 160g (4 x 40g) mini tubs philadelphia cream cheese (either plain or I love the sweet chilli one with this dish)
200g Asparagus
1/2 red capsicum
1/4 cup baby rocket leaves
1/4 cup coriander leaves
lemon juice from half a lemon
salt and pepper
How to make your Spring Boats
Pre heat oven to 240C. Pop the potatoes in a large pot, cover with water adding salt and bring to the boil. Boil for 15 mins. Drain well and place on a baking tray with baking paper and using a heavy spoon press down. Not too hard as you want them to hold together but squash them a bit so that you can pop the toppings on. Now drizzle with the extra virgin olive oil and bake for 25 mins.
Bring a small pot of water to the boil. When ready pop in the spears for a few minutes and then drain and refresh under cold water. Chop into 2cm lengths. ( You could also char grill the aspargus if you prefer) Dice capsicum. Chop up the baby rocket leaves and the coriander leaves roughly.
When the potatoes are ready take them out and leave to cool for a minute or 2. Meanwhile, dress the salad with the lemon juice and salt and pepper. Place potatoes on your serving dish, top with the cream cheese of your choice and then top with the salad and serve!
Spring Boats - serves 4 as a snack or serve as nibbles - makes 12
Ingredients
12 chat potatoes (try and buy thin longish ones)
extra virgin olive oil
salt and pepper
1 x 160g (4 x 40g) mini tubs philadelphia cream cheese (either plain or I love the sweet chilli one with this dish)
200g Asparagus
1/2 red capsicum
1/4 cup baby rocket leaves
1/4 cup coriander leaves
lemon juice from half a lemon
salt and pepper
How to make your Spring Boats
Pre heat oven to 240C. Pop the potatoes in a large pot, cover with water adding salt and bring to the boil. Boil for 15 mins. Drain well and place on a baking tray with baking paper and using a heavy spoon press down. Not too hard as you want them to hold together but squash them a bit so that you can pop the toppings on. Now drizzle with the extra virgin olive oil and bake for 25 mins.
Bring a small pot of water to the boil. When ready pop in the spears for a few minutes and then drain and refresh under cold water. Chop into 2cm lengths. ( You could also char grill the aspargus if you prefer) Dice capsicum. Chop up the baby rocket leaves and the coriander leaves roughly.
When the potatoes are ready take them out and leave to cool for a minute or 2. Meanwhile, dress the salad with the lemon juice and salt and pepper. Place potatoes on your serving dish, top with the cream cheese of your choice and then top with the salad and serve!
Saturday, September 1, 2012
how i met your father - spring lamb and lemon broccoli pie with minted pea puree
It's Father's Day tomorrow and I am well prepared....for a change ;-) Pancakes for breakfast, Banitsa for lunch and this pie for dinner - plus a gift or 4 in between!
Most people, when asked how they met their partner, will usually say,"Actually, it's a funny story...." Well, ours is a little funny-ha ha but more lucky, I think. A few years passed before we actually met face to face but it's always the getting there that's the interesting part.
After HighSchool I decided to do a Bachelor of Arts in Communication ( I think I wanted to be a writer of some kind....?) and was thrown into a group of great individuals from all walks of life. One person in my year who I was a little in awe of (she was an incredible photographer) was in love with all things American. One day her and I were working on a project in an editing suite. Anyway, next door she overheard this American accent and nearly jumped out of her chair to go speak to them. His name was Jasper and he was actually Swedish but had lived in America for a short time. My friend quickly lost interest but I ended becomming good friends with Jasper and we would often catch up for lunch or we'd go grab a coffee or a beer! He lived in an apartment with a young guy who was doing his HSC. Attached to the Apartment was a house where the Mother of the young guy lived. Whenever she was out of town, it was party time! It was at those party's that I would often hear about the young guy's older brother who was living and working in Ireland. So after 4 years, 3 boyfriends, a tattoo and a trip overseas later I turned up to another party. This time I was on my own. I walked into the apartment and realised that I didn't know anyone in the room. I could feel a set of eyes burning into my back and I turned around - it was my future husband - not that I thought that in that moment! He was sitting between two girls but I gave him a smile anyway, turned back around and then went on to find my friends. I ended up sleeping over the night, next door in the main house. Jasper told me that Rob (the older brother) was in the bedroom opposite me and that a few other people were crashing on the couch. The next morning I was up early, I found some breakfast and then being the neat freak that I am..... I cleaned the kitchen. yep.... and..... mopped the floor.....I know! who does that, right? After I finished I went into the bathroom to find some toothpaste. Rob appeared at the door and asked in a gruff voice, "Did you clean the Kitchen?" Thinking I was in trouble I answered with equal gruffness, "So?". He smiled and said, "Wow, you can come back whenever you like"......the rest as they say is history.
Ingredients
1 cup milk
Topping
Most people, when asked how they met their partner, will usually say,"Actually, it's a funny story...." Well, ours is a little funny-ha ha but more lucky, I think. A few years passed before we actually met face to face but it's always the getting there that's the interesting part.
After HighSchool I decided to do a Bachelor of Arts in Communication ( I think I wanted to be a writer of some kind....?) and was thrown into a group of great individuals from all walks of life. One person in my year who I was a little in awe of (she was an incredible photographer) was in love with all things American. One day her and I were working on a project in an editing suite. Anyway, next door she overheard this American accent and nearly jumped out of her chair to go speak to them. His name was Jasper and he was actually Swedish but had lived in America for a short time. My friend quickly lost interest but I ended becomming good friends with Jasper and we would often catch up for lunch or we'd go grab a coffee or a beer! He lived in an apartment with a young guy who was doing his HSC. Attached to the Apartment was a house where the Mother of the young guy lived. Whenever she was out of town, it was party time! It was at those party's that I would often hear about the young guy's older brother who was living and working in Ireland. So after 4 years, 3 boyfriends, a tattoo and a trip overseas later I turned up to another party. This time I was on my own. I walked into the apartment and realised that I didn't know anyone in the room. I could feel a set of eyes burning into my back and I turned around - it was my future husband - not that I thought that in that moment! He was sitting between two girls but I gave him a smile anyway, turned back around and then went on to find my friends. I ended up sleeping over the night, next door in the main house. Jasper told me that Rob (the older brother) was in the bedroom opposite me and that a few other people were crashing on the couch. The next morning I was up early, I found some breakfast and then being the neat freak that I am..... I cleaned the kitchen. yep.... and..... mopped the floor.....I know! who does that, right? After I finished I went into the bathroom to find some toothpaste. Rob appeared at the door and asked in a gruff voice, "Did you clean the Kitchen?" Thinking I was in trouble I answered with equal gruffness, "So?". He smiled and said, "Wow, you can come back whenever you like"......the rest as they say is history.
Ingredients
oil
1 onion, finely diced
1 garlic clove, finely diced
1 stick celery, finely sliced
1 carrot, finely sliced
salt and pepper
500g lamb shoulder cubed
1 head of broccoli, chopped into florets (approx. 200G)
1 teaspoon lemon zest and splash of lemon juice
roux
40g butter
18g plain flour1 cup milk
Topping
600g orange sweet potato,(chop into 2cm cubes, boiled until tender, approx. 20
mins from cold water till done).
Dash of milk Mash
30g butter
30g parmesan cheese
salt and pepper
3 sheets of shortcrust pastry
To serve on the side
1 and a half cups of frozen peas
A few mint leaves
How to make your spring lamb and lemon broccoli pie with minted pea puree
For this dish you need to have everything ready to go. Pre-heat oven to 200C and have your baking dish(es) ready to go. Spray with olive oil spray. set aside. Get your sweet potatoes on. When they are ready, drain well and add the butter, parmesan cheese and the dash of milk and mash. Season with salt and pepper and set aside.
In a large frypan add some oil over a medium heat. Saute the onion, garlic, carrot and celery until soft. Place in a bowl. Add the lamb in 2 stages, turning and cooking through. Start the roux. Take out the pastry from the freezer! Place the butter in a small saucepan over a medium heat. When melted add the flour and stir to a paste. Slowly add the milk and the keep strring. Don't stop! It should take approx. 5 minutes to thicken. When your meat is done add it to the cooked vegetables and set aside to cool slightly. When the roux is done, set it aside to cool slightly. You should have your sweet potato ready too. Now pop your broccoli in a microwave safe dish with the lemon juice and lemon zest and microwave for 4 minutes (850 watt microwave) Now add everything to the roux and add salt and pepper to taste.
Place your pastry in your desired dish(es) Add filling and top with sweet potato mash. Bake for approx. 30 minutes depending on your choice of dish. Just keep an eye on it.
Just before serving pop the frozen peas in a plastic container with a splash of water and cook with an 850 watt microwave for 4 minutes 40secs. drain, add the mint leaves and puree with a stick blender just before serving. season with salt and pepper.
To serve you can have the minted pea puree on the side or pop a bit on the top of the pie. Delicious!
Happy Father's Day Rob and yes, I am still cleaning your kitchen!
Sunday, August 19, 2012
chai tiramisu cupcakes
To celebrate the birthday of the lovely Caroline I wanted to make her a cake that was nothing less then special. I've been thinking about this combination for a while now. Tiramisu is traditionally with coffee so I figured chai tea would work in a similar way. The first time I made this dessert it didn't work at all, actually it reminded me of clag glue with honey; Obviously I'm not very cluey with custard! So to make it a little easier on myself I thought - Cupcakes! Hooray for Cupcakes!
I bought the very special Dolfin Chocolat, au hot masala. A lovely subtle chai spiced chocolate from Belgium and teamed it with some marscapone and a custard flavoured cupcake - Ta dah! Chai Tiramisu Cupcakes!
Make them for someone special.
Ingredients
3 cups Self Raising flour, sifted
2/3 cup vanilla custard powder, sifted
dash of salt
1 cup caster sugar
2 cups water
2/3 cup canola oil
1 teaspoon vanilla extract
2 tablespoons lemon juice
100g Dolfin Chocolat - au hot masala (2 x 70g packets)
2 tablespoons pouring cream
125g marscapone
Ground cinnamon, for dusting
How to make your Chai Tiramisu Cupcakes
Pre-heat oven to 180C or 160C fan forced. Line 2 x 12 hole muffin pans with cases.
Sift flour into a large bowl along with salt and custard powder. Stir through caster sugar. In a seperate bowl combine water, oil, vanilla and lemon juice. Whisk the liquid into the dry ingredients until smooth. Divide among cases. The mix is quite runny, don't worry! I use a 1/4 cup measure which gives me 24 cupcakes exactly. bake for 25 minutes. Remove when ready and allow to cool slightly in the muffin tray. Cool completely on a rack.
When cooled and you are ready to serve them cut out circles in the top of each cake, cutting an an angle, almost like a funnel shape, keeping each round as you'll place these like a hat over the choc and marscapone (I used a muffin tree which held 19 cupcakes and the chocolate mix was just enough. If you want to make the full 24 chai tiramisu cupcakes you can either use a little less chocolate in each cupcake or use more chocolate in the melting process)
Using a small saucepan add 2 tablespoons of pouring cream and 100g of the hot masala chocolate. Using a spatula stir over a low heat until melted and smooth. set aside to cool for a minute.
Spoon in a little pool of chocolate into each round, top with a little dollop of marscapone (roughly the same amount) place the round at a slight angle and dust with the ground cinnamon. Enjoy immediately. Maybe with some chai tea too!
I bought the very special Dolfin Chocolat, au hot masala. A lovely subtle chai spiced chocolate from Belgium and teamed it with some marscapone and a custard flavoured cupcake - Ta dah! Chai Tiramisu Cupcakes!
Make them for someone special.
Ingredients
3 cups Self Raising flour, sifted
2/3 cup vanilla custard powder, sifted
dash of salt
1 cup caster sugar
2 cups water
2/3 cup canola oil
1 teaspoon vanilla extract
2 tablespoons lemon juice
100g Dolfin Chocolat - au hot masala (2 x 70g packets)
2 tablespoons pouring cream
125g marscapone
Ground cinnamon, for dusting
How to make your Chai Tiramisu Cupcakes
Pre-heat oven to 180C or 160C fan forced. Line 2 x 12 hole muffin pans with cases.
Sift flour into a large bowl along with salt and custard powder. Stir through caster sugar. In a seperate bowl combine water, oil, vanilla and lemon juice. Whisk the liquid into the dry ingredients until smooth. Divide among cases. The mix is quite runny, don't worry! I use a 1/4 cup measure which gives me 24 cupcakes exactly. bake for 25 minutes. Remove when ready and allow to cool slightly in the muffin tray. Cool completely on a rack.
When cooled and you are ready to serve them cut out circles in the top of each cake, cutting an an angle, almost like a funnel shape, keeping each round as you'll place these like a hat over the choc and marscapone (I used a muffin tree which held 19 cupcakes and the chocolate mix was just enough. If you want to make the full 24 chai tiramisu cupcakes you can either use a little less chocolate in each cupcake or use more chocolate in the melting process)
Using a small saucepan add 2 tablespoons of pouring cream and 100g of the hot masala chocolate. Using a spatula stir over a low heat until melted and smooth. set aside to cool for a minute.
Spoon in a little pool of chocolate into each round, top with a little dollop of marscapone (roughly the same amount) place the round at a slight angle and dust with the ground cinnamon. Enjoy immediately. Maybe with some chai tea too!
Happy Birthdays!
Wednesday, August 15, 2012
a little place called.....kiama
Not sure if I have mentioned this before but I grew up in a little place called, Kiama. Back then it was a lot smaller and a lot quieter. I remember we couldn't buy bread on the weekends; and the nice man at the petrol station use to fill up our car for us and give our windscreen a clean too and I always slept with my window open. If it was really hot I'd prop the back door open too which use to be opposite my bedroom door. The smell of the beach, the cool air of the mountains and the warmth of the sunny sunshine always take me back there.
As we get older I think we all have a soft spot for where we grew up, especially if we no longer live there. At the moment I am about a 2 hour drive away from Kiama, which doesn't sound too far away but having 2 small children in the car, it always feels like 8 hours!
Over the last couple of years the following pieces have come my way by chance. Something makes me look under a certain book or peek inside an old yellowed envelope or flick through a stack of magazines or even a fleeting coversation with a new friend from Etsy can bring me exciting things. From these moments, these pieces have found me and they stay close to me and they remind me of home.
As we get older I think we all have a soft spot for where we grew up, especially if we no longer live there. At the moment I am about a 2 hour drive away from Kiama, which doesn't sound too far away but having 2 small children in the car, it always feels like 8 hours!
Over the last couple of years the following pieces have come my way by chance. Something makes me look under a certain book or peek inside an old yellowed envelope or flick through a stack of magazines or even a fleeting coversation with a new friend from Etsy can bring me exciting things. From these moments, these pieces have found me and they stay close to me and they remind me of home.
| I bought a gorgeous vintage piece from Vegas and Rose on Etsy and the lovely Penthea gave me this amazing spoon of the Kiama Blowhole.......it literally blew my mind! |
| February 1998 issue of Country Style - Kiama - Mountains by the sea |
| A gorgeous old map of the local kiama area from 1932 |
| It now lives in my sons room |
| 8 fabulous old black and white snap shots of Kiama.....I nearly didn't look in the envelope but my curiosity always gets the better of me! |
| I almost wish this photo of the Post Office was in colour! I remember when they painted it pink in the 80s, yep, pink! It took the town a little while to get use to that one! |
Tuesday, August 7, 2012
No regretsy on Etsy - 2 years of fun!
Hello there! Today I celebrate 2 years on Etsy...YAY! Here are some of my favourite things - my favourite pieces and my favourite photos! that I thought I would share with you all. time flys.....
wow! There were so many more pictures I wanted to add but hey, you can just go and check out my shop......have fun! ;-)
| This is my all time favourite picture. Something about milk glass, I just think it is stunning and the colour of this wool with the feather, just divine! |
wow! There were so many more pictures I wanted to add but hey, you can just go and check out my shop......have fun! ;-)
Saturday, July 28, 2012
peanut butter and chocolate freddo brownies
Oh dear, we have been eating our daughters daycare fundraiser chocolates like they are free! Eating one each night along with a cup of tea after the kids have gone to bed. It's an expensive slice of heaven but a small price to pay for a few minutes of sanity in our day! We are half way through the box, only 24 to go.....I am 2 kilos heavier (though that could be all the lasagne I've been enjoying this winter!) and my husband, who is a keen cyclist, has noticed his waistline has ever so slightly expanded too.....We have to get through these chocolates sooner rather then later and we need to share them with people....lots of people. Maybe I could grate up the chocolates and hide them in a peanut butter brownie?.....done!
Ingredients
Add the flour mix to the egg mix and fold together gently. Add the 2 grated freddo frogs and mix gently.
Add it to your slice tin and smooth down. Pop it in the oven and bake for approx 30 minutes. Take out when centre springs back and cut into 12 pieces or any size you like. Enjoy warm and with or without a sprinkle of icing sugar.
Ingredients
1/3 cup or 70g softened butter
½ cup brown sugar or approx 90g
2 eggs
1/2 cup smooth full fat peanut butter 0r 120g (at room temp)
1 cup plain flour, sifted
1/4 teaspoon bicarb soda
good dash of salt
2 x 35g freddo frog chocolates, grated
How to make your peanut butter and chocolate freddo brownies
Pre heat your oven to 170C. I reccomend using a slice tin without baking paper as the mix is quite thick and tricky to smooth down. Just make sure you grease it well. Otherwise, use baking paper and smooth it the best you can.
In a bowl add the butter and sugar and beat until light and creamy. Add the eggs one at a time and beat well after each addition until light and fluffy. Stir in peanut butter.
In a separate bowl mix together the sifted plain flour and the bi-carb soda and salt.Add the flour mix to the egg mix and fold together gently. Add the 2 grated freddo frogs and mix gently.
Add it to your slice tin and smooth down. Pop it in the oven and bake for approx 30 minutes. Take out when centre springs back and cut into 12 pieces or any size you like. Enjoy warm and with or without a sprinkle of icing sugar.
Subscribe to:
Posts (Atom)